
Blog, potato (Solanum tuberosum), seed saving, true potato seed (TPS)
Potato: Extracting true potato seed (TPS)
Sep
Introduction
This is the procedure that I use to extract potato seeds. It is not necessarily the procedure that you would want to use. This procedure is suitable for extracting large amounts of seed while maximizing germination and minimizing potential for disease transmission. I extract seed from as much as 400 quarts of berries in a given year and need a process that is fast and efficient with uniform results. You can use this procedure with any amount of berries, but if you have less than a quart, you will probably find it easier to use standard methods for tomato seed extraction, which can be as simple as cutting the berries in half, squeezing out the seeds into a jar of water, and allowing them to ferment for about a week.
This post has been updated several times, to reflect changes in how I do the extraction.
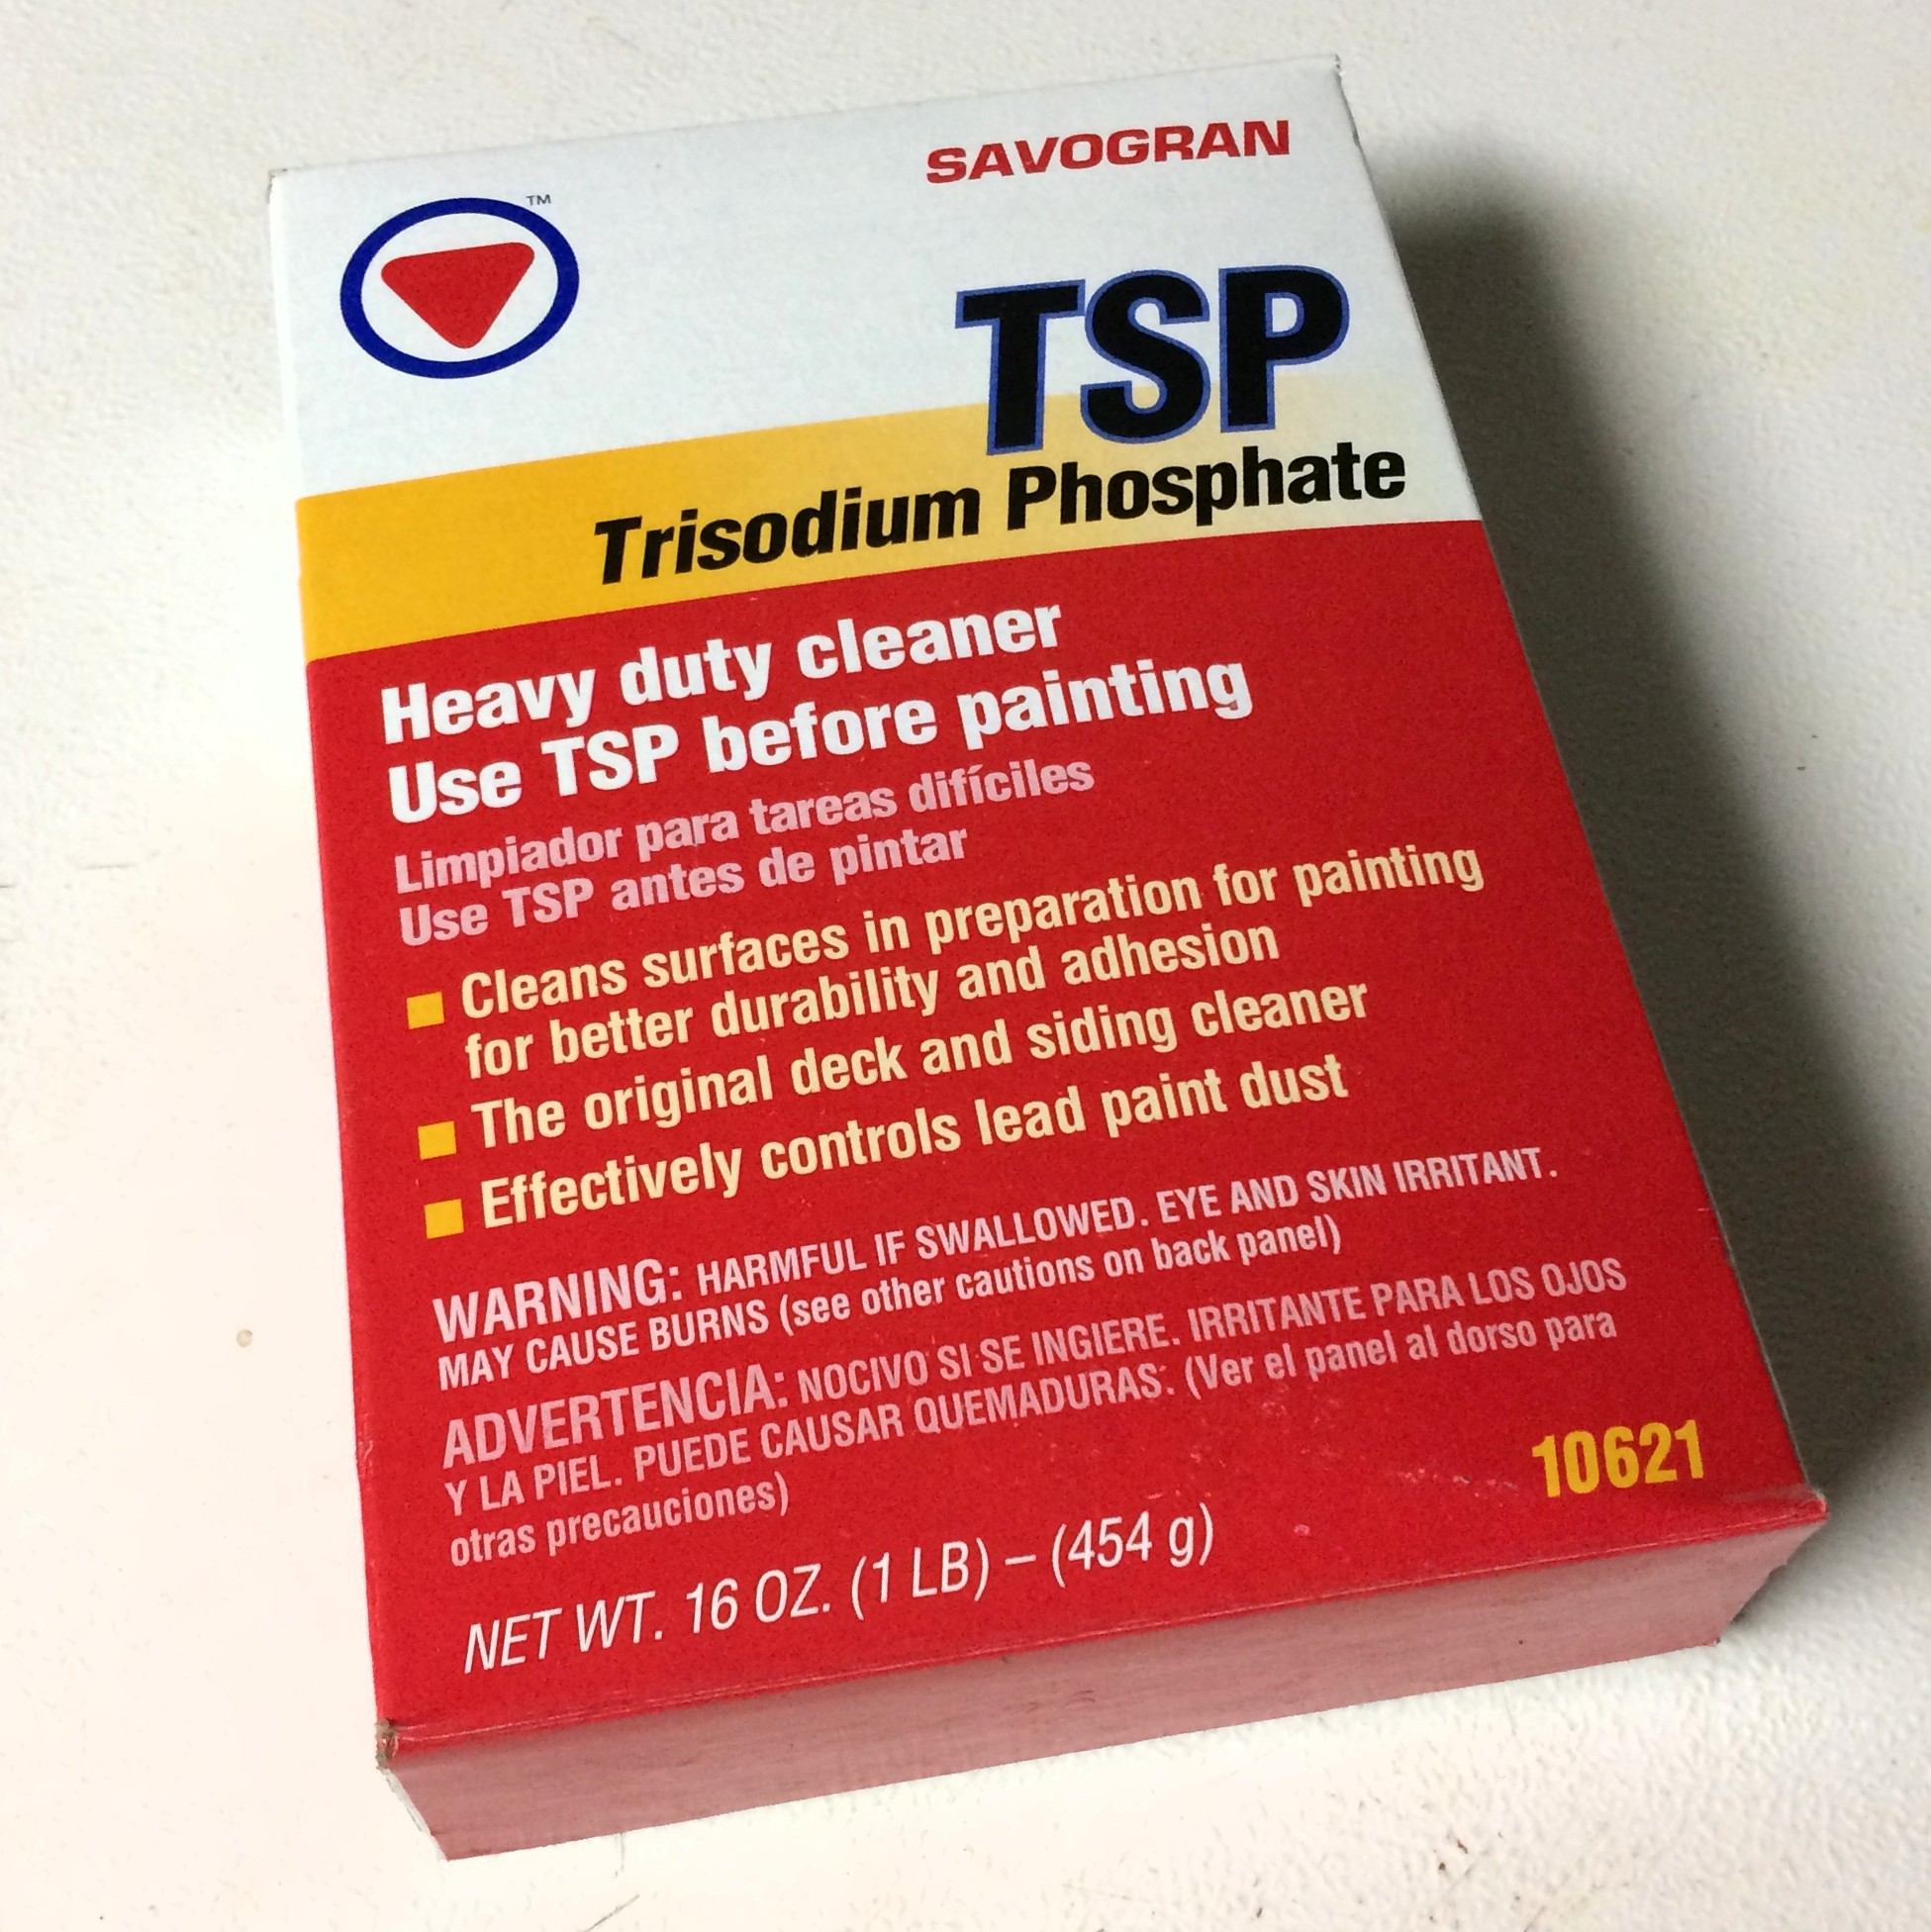 This procedure uses trisodium phosphate (TSP) to remove germination inhibitors. TSP is a detergent that was once used in laundry soaps. Because phosphate detergents are not great for the environment (they end up acting as fertilizers), TSP was outlawed for that purpose. It is still commonly used to prepare surfaces for painting, so you can find it in the paint section of most hardware stores. Many people are surprised to learn that it is also used as a food additive. The amounts used in food are, of course, many times smaller than the concentrated solution used in this procedure. Some people are worried that TSP might be dangerous. It is roughly as dangerous as bleach in the concentrations used in this procedure, so common sense precautions will suffice. You should rinse your hands with water if you get it on your skin and keep it out of your eyes. Don’t drink a glass of it, just as you wouldn’t drink a glass of bleach. The very small amount that you will use for processing seeds is no danger to the environment. It can be safely disposed of down the drain. While large amounts can be bad for wastewater treatment plants, the tiny amount used for seed processing will be diluted to insignificance long before it reaches one. There are other detergents that you might be able to use, but I still recommend TSP because it has been evaluated in many studies and found to be superior at eliminating surface pathogens from seeds. This procedure uses trisodium phosphate (TSP) to remove germination inhibitors. TSP is a detergent that was once used in laundry soaps. Because phosphate detergents are not great for the environment (they end up acting as fertilizers), TSP was outlawed for that purpose. It is still commonly used to prepare surfaces for painting, so you can find it in the paint section of most hardware stores. Many people are surprised to learn that it is also used as a food additive. The amounts used in food are, of course, many times smaller than the concentrated solution used in this procedure. Some people are worried that TSP might be dangerous. It is roughly as dangerous as bleach in the concentrations used in this procedure, so common sense precautions will suffice. You should rinse your hands with water if you get it on your skin and keep it out of your eyes. Don’t drink a glass of it, just as you wouldn’t drink a glass of bleach. The very small amount that you will use for processing seeds is no danger to the environment. It can be safely disposed of down the drain. While large amounts can be bad for wastewater treatment plants, the tiny amount used for seed processing will be diluted to insignificance long before it reaches one. There are other detergents that you might be able to use, but I still recommend TSP because it has been evaluated in many studies and found to be superior at eliminating surface pathogens from seeds. |
This is not the only way to extract potato seeds. The fermentation method is less work (in fact, you can let nature do most of the work) but the results may not be as good. The fermentation method also takes more time and involves having a lot of containers of fermenting liquid sitting around if you have lots of berries to extract.
You can find other methods by searching for tomato seed extraction methods, which will also work for potato seeds.
Requirements
- 1 blender
- 1 strainer through which potato seeds can pass (at least 2 quart capacity)
- 1 strainer through which potato seeds cannot pass (at least 1 cup capacity)
- 1 3 gallon catch container (bucket)
- A couple of small bowls
- 2-4 tbsp plain chlorine bleach
- 1 tbsp TSP powder (trisodium phosphate, usually available at hardware stores)
- Kraft paper to use as blotter
- About a quart of potato berries
- 3 grams (more is fine, but less is risky) of silica gel desiccant packets per quart of berries
Extracting Seeds from Berries
Wait to process until your potato berries are very soft. They don’t have to be mushy, but you should be able to rupture one easily by squeezing it. You can process them when they are still hard, but you will get a lower germination rate, you’ll have a harder time separating the seeds from the bulk, and the amount of gel on the seeds may be difficult to remove. Trust me on this: processing berries before they are soft is a pain and it is better to be patient.
I have marked as optional steps that I perform that aren’t essential. This procedure assumes that you are working with a quart of berries, since that is the amount that I use. A little more or less doesn’t matter.
Cleaning and Ripening the Berries
These steps should be performed soon after you harvest the berries.
(Optional) Wash the berries with a little dish detergent.
Might as well get any dirt off before you start, since it is harder to remove it later.
(Optional) Soak the berries in 1 gallon of water with 2 tbsp of chlorine bleach for 15 minutes.
This will surface sterilize the berries and help to cut down on pathogens that might otherwise be transferred to the seeds. This step is extremely conservative, since you will also sterilize the seeds later, so if you decide to skip it, you probably won’t see much difference.
Store the berries in a sealed container until they are all soft.
Resealable plastic bags, deli containers, and mason jars are all good choices. You want to keep insects out and moisture in.
Extracting the Seeds
Once the berries are nice and soft, it is time to extract the seeds. Expect this to take at least and hour the first time you attempt it. It is messy and there will be some fiddling with your strainers to figure out how best to get the seeds passed through.
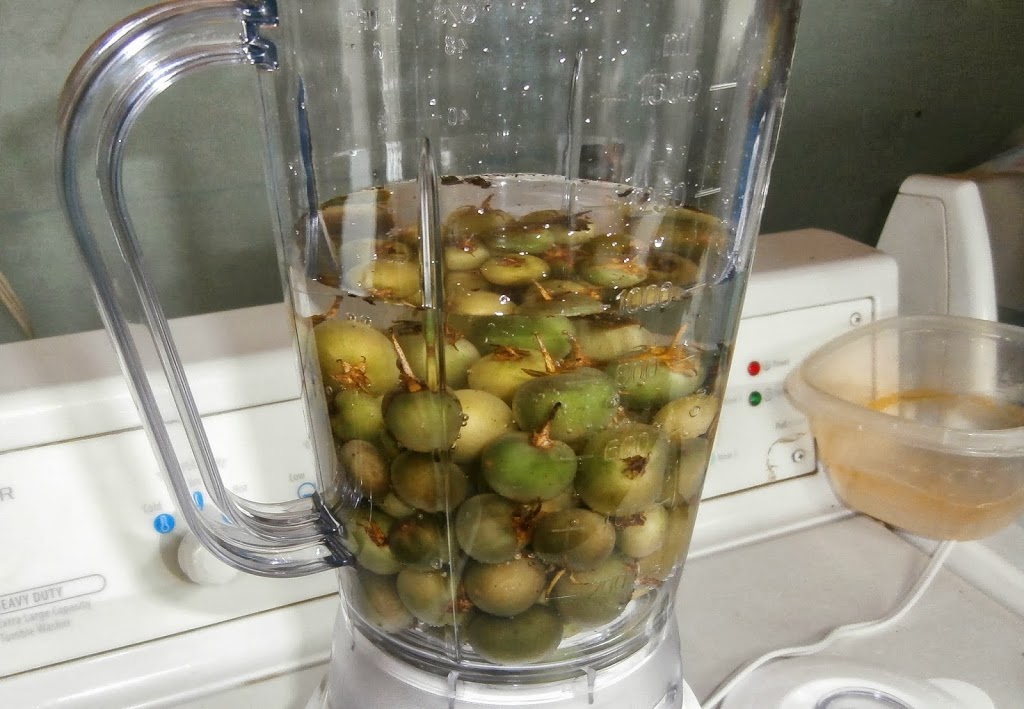
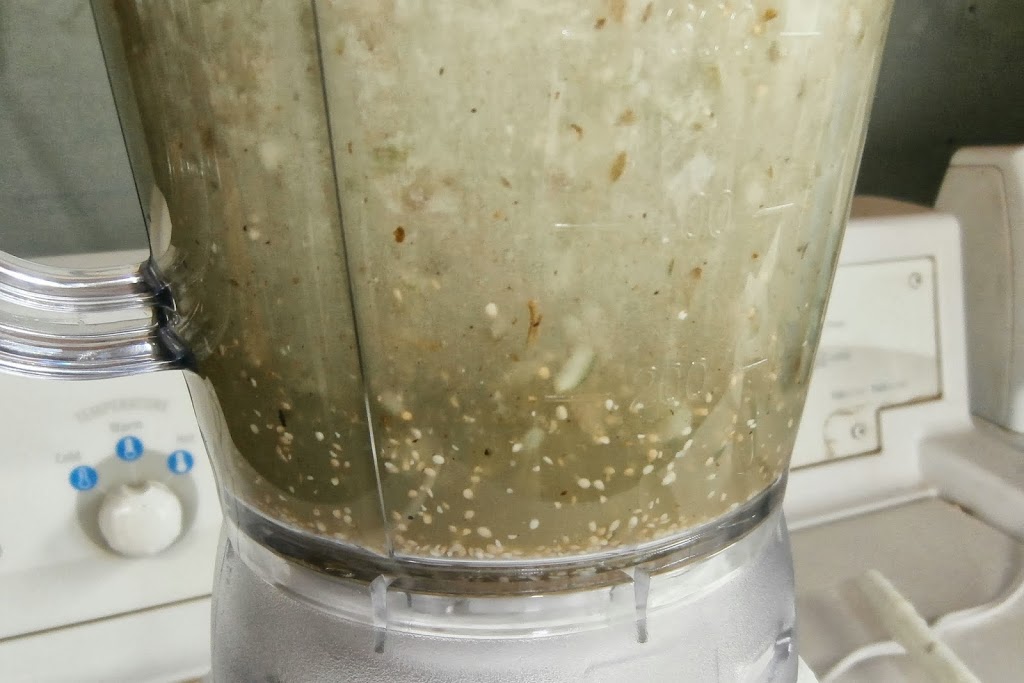
Dump the berries in the blender.
Don’t fill more than half way or you’re asking for a mess. If you need to process larger numbers of berries per batch, buy a bigger blender pitcher or a commercial blender. I have moved up to 70 fluid ounce blender, which cuts down on the mess.
Add an amount of water equal to the berries.
I use a quart of berries, so I add a quart of water. Again, make sure to leave some space in the blender pitcher because this is going to foam up quite a bit.
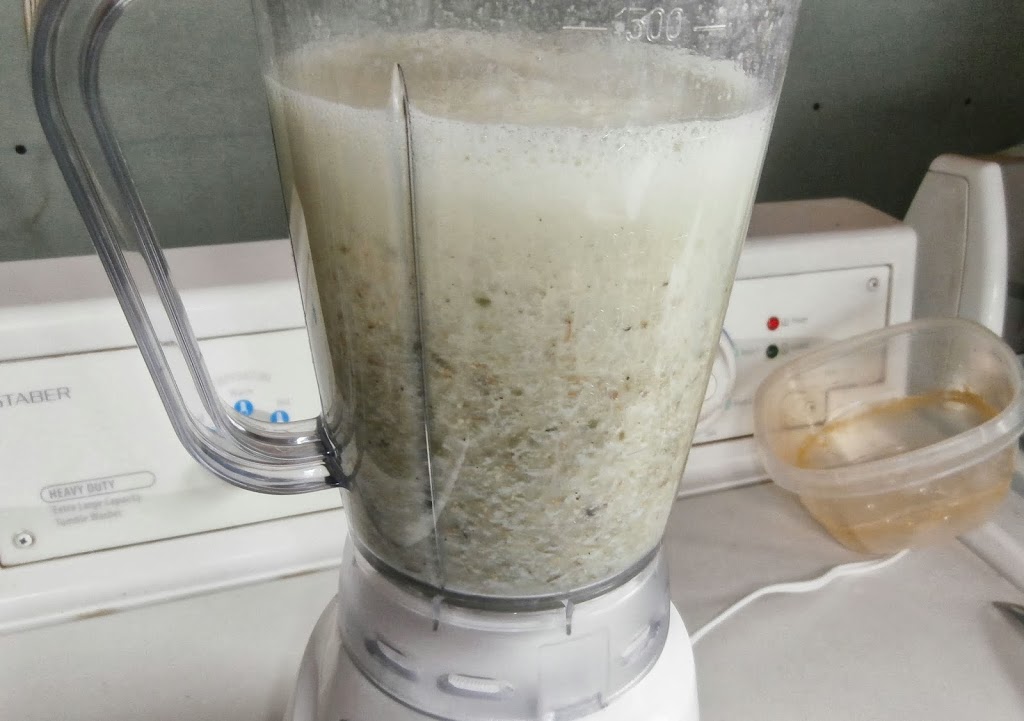
Blend until the berries are reduced to pulp.
It shouldn’t take more than 30 seconds, and much less if the berries are very ripe.
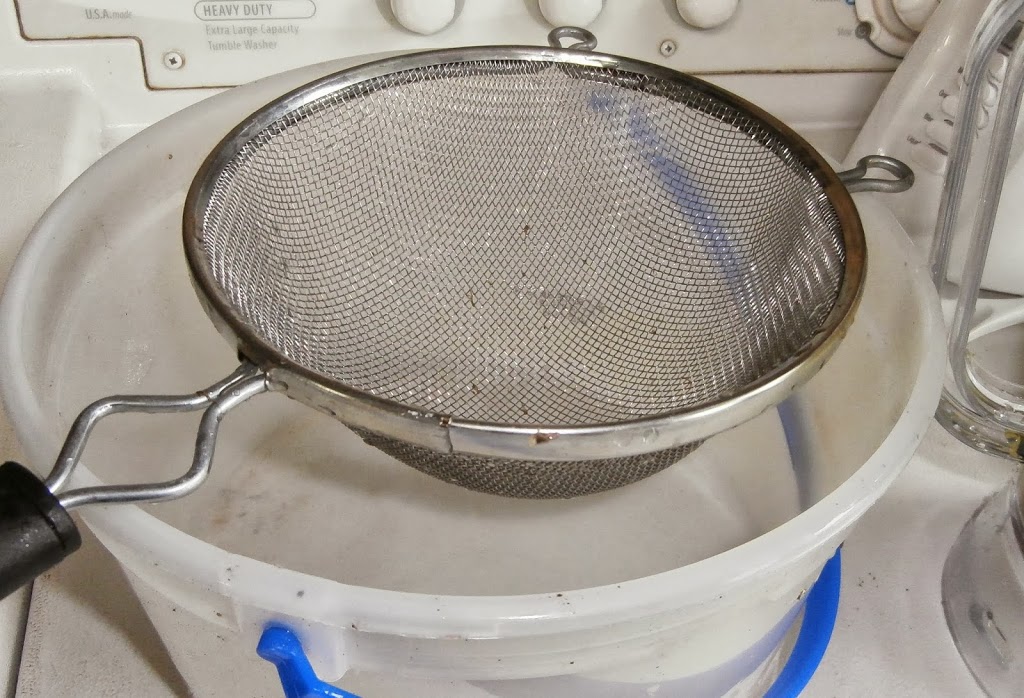
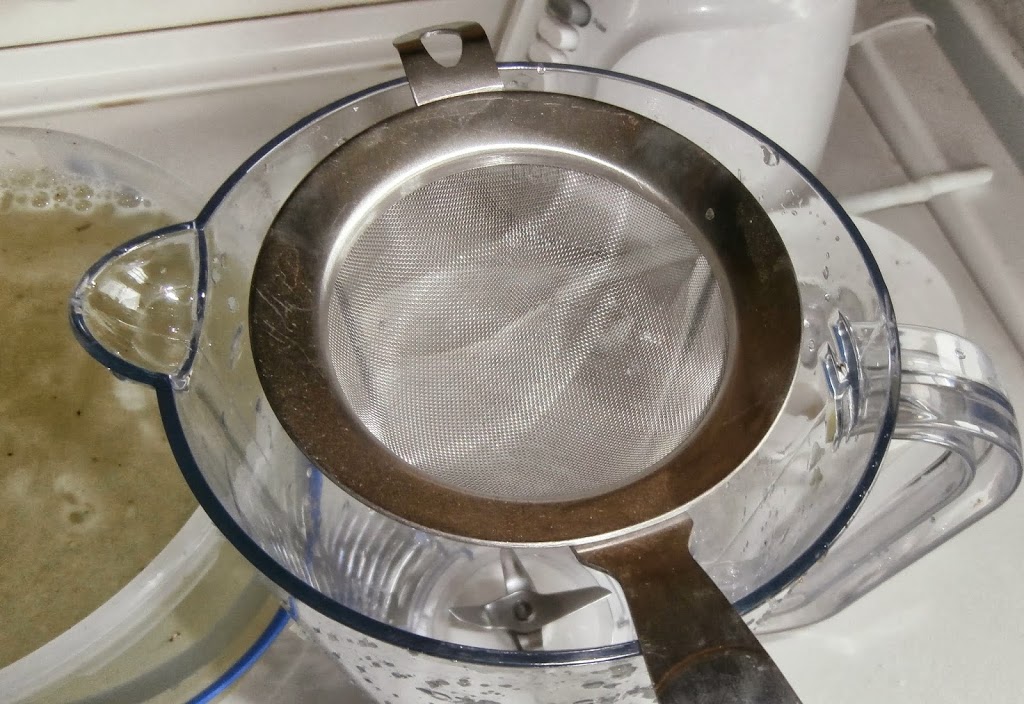
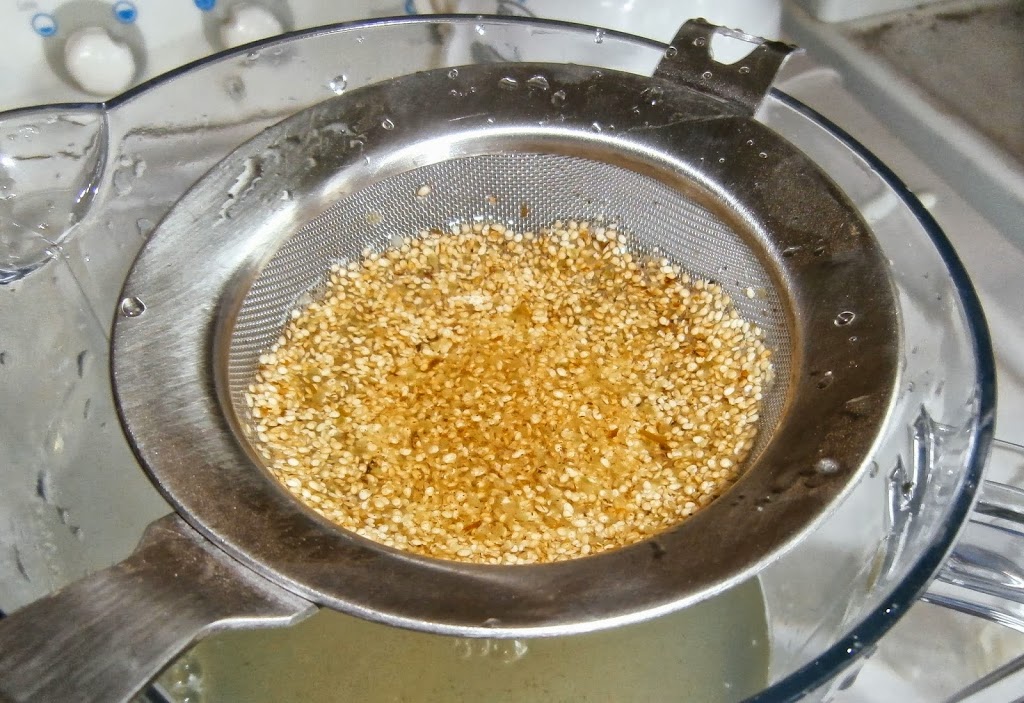
Strain the pulp from the seeds using a strainer that the seeds can just fit through.
You want the seeds to fall through the strainer and the bulk to stay in it, so use a strainer that is just big enough for potato seeds to pass through.
Rest the strainer on a catch container. Dump the blended berries into the strainer and run water through the mass until all the seeds have been washed into the container. You might need to run a lot of water. I use a three gallon bucket for a catch container.
 |
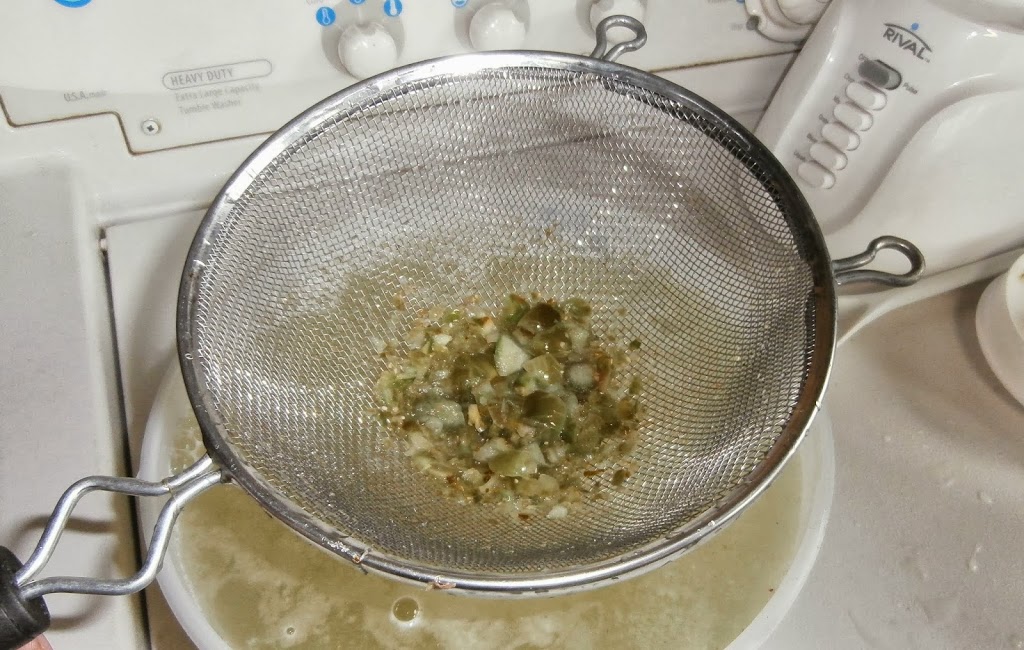 |
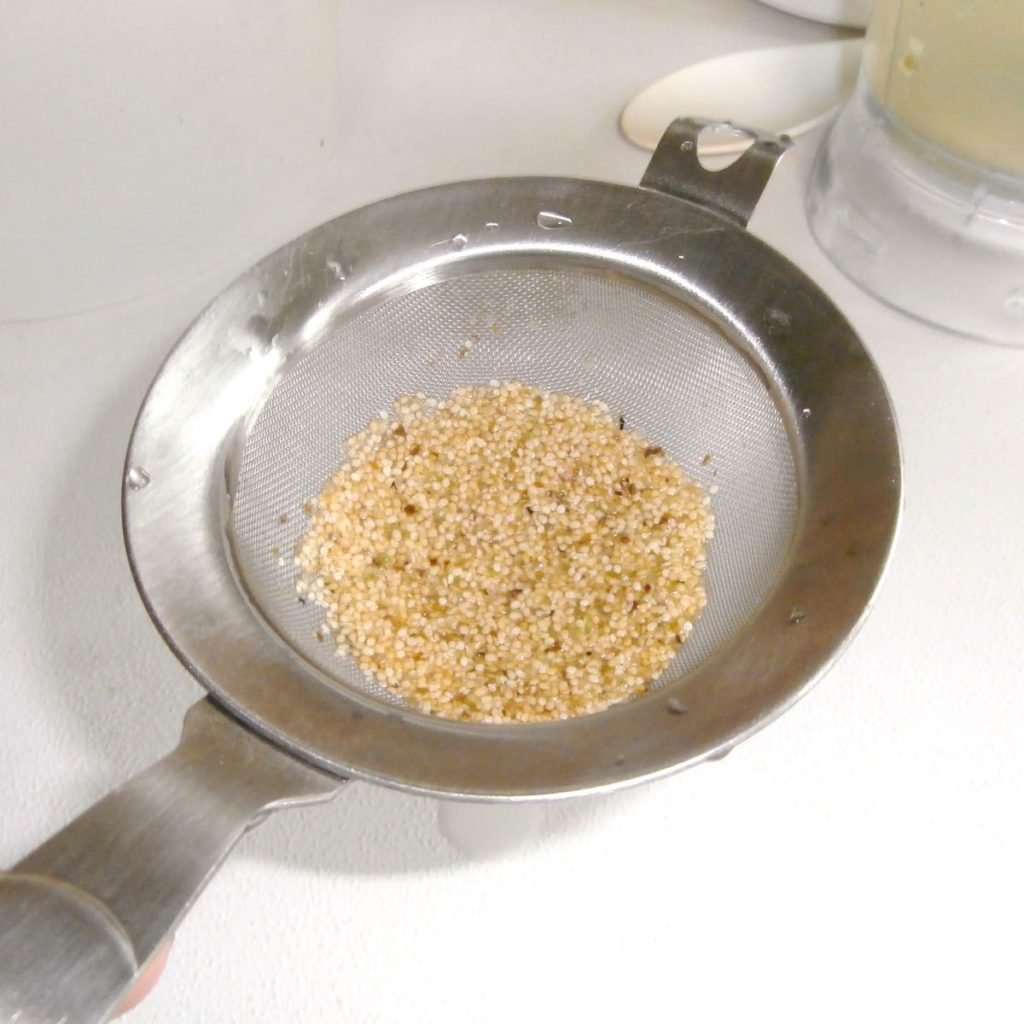
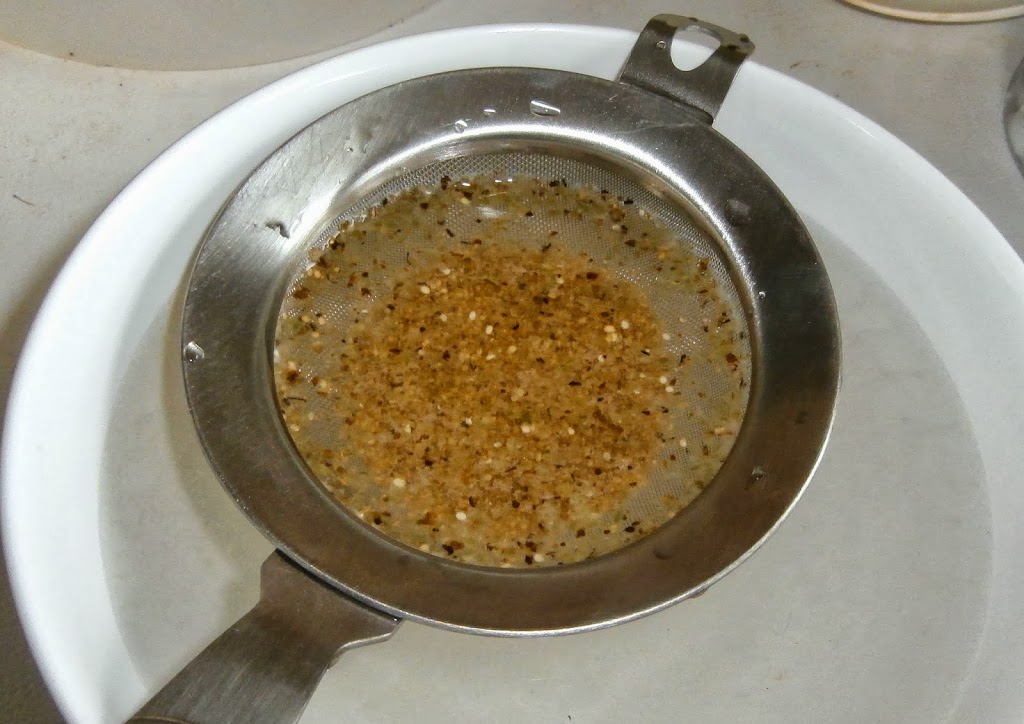
Strain the seeds through your fine-meshed strainer.
This time, you want the seeds to stay in the strainer, so use one that is fine enough that potato seeds can’t fall through it. This stage gets rid of any dirt and really fine debris.
Run water through the seeds until it runs clean and is not slimy. It is OK if there are still tiny bits of pulp and dirt. You would have to work really hard to get rid of the really small stuff. It will dry out with the seeds and nearly disappear.
 |
 |
Removing Germination Inhibitors
Potato seeds are covered with a sticky gel that acts as a germination inhibitor. By removing it, you make it possible to germinate seeds almost immediately. When the gel is not removed, it may take months or even years for the seed to reach its maximum germination potential. In addition, the gel acts like glue, so if you don’t remove it, you will end up with a mass of seeds all stuck together once you dry them.
Make TSP solution.
Put one cup of warm water in a bowl and add 1 tbsp of powdered TSP.
Stir it until it is fully or mostly dissolved. Warm water will dissolve the TSP more easily. TSP is fairly harsh; try to avoid getting it on your skin and rinse it off if you do. It is no more dangerous than bleach, but you don’t want to leave bleach on your skin either.
(You want about a 10% TSP solution. TSP is about 24 grams per tablespoon and there are about 237 milliliters per cup. Percent solutions are calculated as grams of solute / mL of solvent *100, so this works out very conveniently as a roughly 10% solution.)
Soak the seeds in the TSP solution for 8 to 12 hours.
I soak the seeds in the TSP solution for an hour on a magnetic stirrer, so that is an option if you have a stirrer. Before I used a stirrer, I would just let them sit overnight, so that is what I recommend for normal people who do not have a magnetic stirrer handy.
Rinse the seeds with water.
Just a quick rinse this time. You just need to get the TSP off of the seeds. If you processed hard berries and did a short TSP treatment, you might need to rinse in warm water to dislodge the remaining gel. If you soaked overnight, cold water is fine.
(Optional) Treating to Minimize Pathogens
True potato seeds can carry pathogens, both on the exterior and inside the seed. External diseases tend to be fungal, such as the early blight pathogen, which will cause damping off when present on the seed coat. You can reduce surface pathogens with bleach.
Make bleach solution.
Put two cups of water in a bowl and add 2 tbsp of plain chlorine bleach.
This will make a 0.375% bleach solution using standard 6% sodium hypochlorite bleach – Clorox or the like. You may also see this referred to as a ratio. This is a 1:16 bleach solution because there are 16 tbsp in a cup. 1:9 is often recommended (and confusingly referred to as a 10% solution because 10% is bleach, even though the bleach you start with is a 6% solution to start with), but I think that is overkill.
Soak the seeds in the bleach solution for 10 minutes.
The bleach soak should help to destroy pathogens on the exterior of the seed and may also help to break down any remaining gel.
Rinse the seeds with water.
Give it a good rise to get rid of the bleach.
(Optional) Dry bake the seeds to reduce pathogens further.
Important: Perform this step after drying the seeds. Baking seeds while they are still wet is likely to damage them.
Place seeds in the oven at 160 degrees F for 48 hours. This results in a slight (2-3%) reduction in germination, but it is also sufficient to destroy some viruses in the seed coat or interior of the seed. You should not need to do this under normal circumstances, but if you know that you have exposure to a seed borne virus, like Tobacco Mosaic Virus, it would be a good idea. This also does a great job of drying the seeds to a very low moisture content.
Drying and Storing
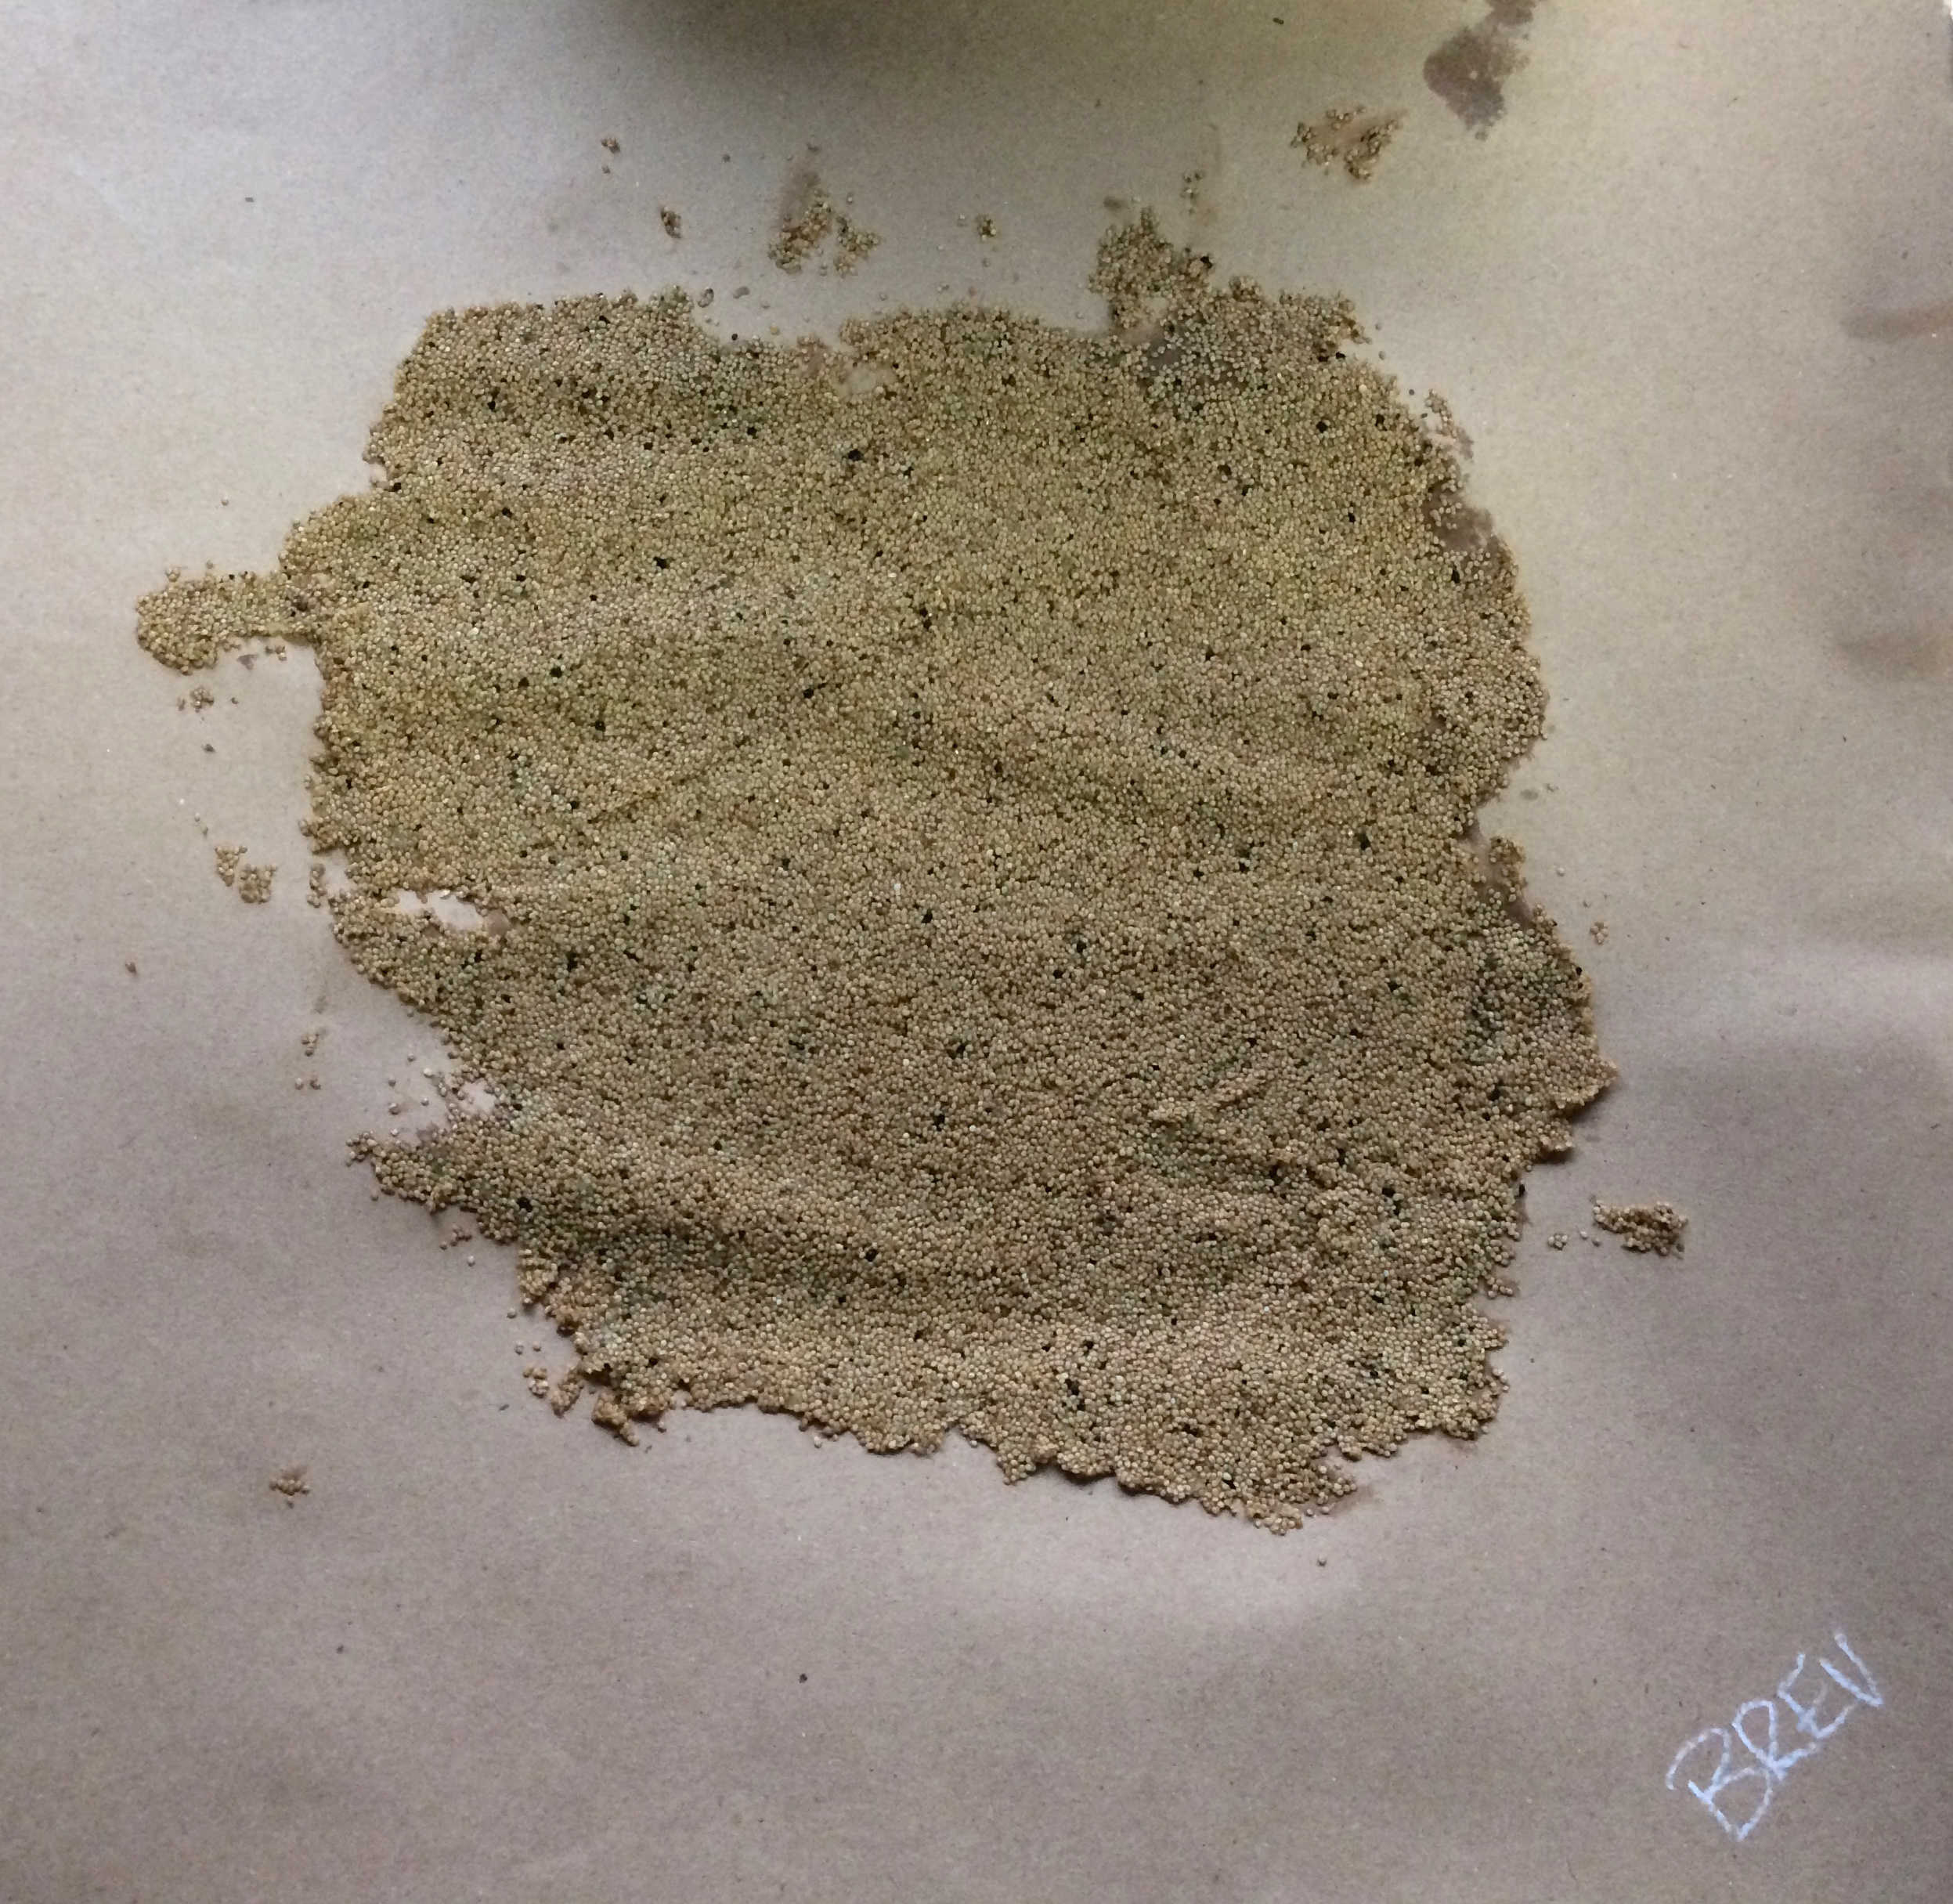
Let the seeds drip dry for a little while and then dump them on some paper to dry.
Try to spread them out some so that they don’t clump together. Depending on your air humidity and how clumpy they are, it could take a week or two for them to dry. You can’t do any harm by allowing them extra time to dry, but you will have storage problems if you don’t let them dry long enough.
I dry seeds on Kraft paper, which is nicely absorbent, but not so fibrous that seeds will stick to it, as they do to paper towels.
Store your seeds in a bag or a jar, preferably with some desiccant.
I recommend storing the dry seeds with a packet of silica gel desiccant as an insurance policy. If the seeds weren’t quite as dry as you thought, they could spoil. Packets of at least three grams have always done a good job for me. Smaller packets might not be enough. If you ever see even a small amount of condensation inside a container of seed, immediately add more desiccant.
(Optional) Freeze your seeds for long term storage.
If you want your seeds to be retain good germination for longer than three years, store them in the freezer or refrigerator. Make sure that they are fully dry before freezing. If in doubt, store them in containers with silica gel desiccant for a few weeks before freezing.
That’s it! This may seem like a lot of work (and it can be if you are maintaining a lot of potato varieties) but potato berries generally give a lot of seed and it remains viable for a long time, so you probably won’t have to do this for every variety every year.
Wow i have been wanting to no more about TPS .thank you .hope to learn a lot from you.
Wow ! That’s a hell of à process.
I might not get all the products but I’ll give it my best shot to try and do it.
Thanks for your détailled explainations
With tomatoes if you soak them for 2-3 days in water, the sprout inhibiter will fall off when you stir them (say in a cup or bucket), you don’t even have to clean them, just mash it and put it in the water for its soaking, but I think trying to pick out mostly just seed speeds up the cleaning process, just remember to stir them once or twice a day and eventually you will notice it falling off.
Anyway I assume that would work with potato seeds if you do not wish to buy/use TSP powder.
Goodluck